Cereal-Box Rib Stations: Straight Wings From a Kitchen Table Bench
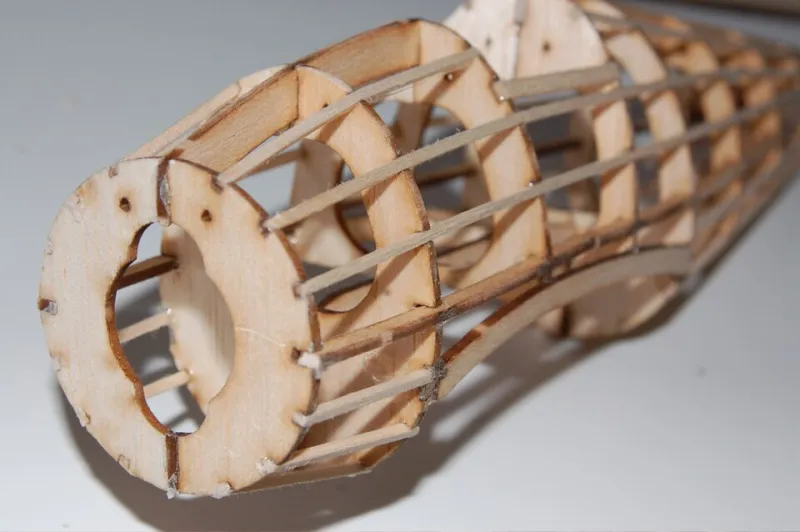
Photo: Zach Vesoulis, Public domain, via Wikimedia Commons
There is a particular kind of UK modelling that happens on a kitchen table, gets packed away before tea, and relies on the fact that nobody has a dedicated workshop. If that sounds familiar, you do not need a giant building board to make a straight wing. You need a flat surface, some stiff card, a box of pins and a routine you can repeat. Cereal-packet card is ideal: free, stiff enough to hold a rib upright, and easy to replace when it goes fuzzy at the edges.
This is not a precision-engineered jig. It is a cheap, repeatable system for a small sport wing — the sort of 30- to 48-inch model that lives on a shelf and gets flown on a blustery Sunday. The aim is simple: every rib goes in at the same station, at the same angle, with the washout you intended rather than the washout you accidentally built in.
Start with a board that can disappear
A melamine shelf offcut, a piece of MDF, or even a stout piece of foam board will do. It needs to be flat, not merely smooth. Check it with a steel rule and a bright light: sight along the edge, then lay a straightedge across the diagonal. If you can slide a business card under the middle, it is not flat enough for a wing.
Tape the plan to the board, then cover the working area with baking parchment or cling film. This is the single most important step if you want the wing to leave the jig. PVA and thin CA will happily glue balsa to MDF, and a wing that is permanently attached to a shelf offcut is a workshop ornament, not an aeroplane.
Mark the rib stations on the plan with a fine pen. Then mark them again on a strip of masking tape along the leading edge and trailing edge. That sounds fussy. It is also the difference between a wing that looks right and one that has a rib creeping forward by two millimetres halfway down the span.
Cut card fences, not complicated cradles
The jig itself is almost insultingly simple. For each rib station, cut two rectangles of cereal-box card roughly 10 mm taller than the rib and 15 mm wider. Pin one fence to the board along the station line. Slide the balsa rib against it, check it with a small engineer’s square, then pin the second fence on the other side. The rib is now trapped upright between two card cheeks.
Repeat at every station. You are effectively building a series of shallow slots. The card does not need to follow the rib profile; it only needs to be tall enough to hold the rib square and stiff enough not to flop over when you look at it. If the card starts to curl, cut a fresh set. Cereal packets are plentiful and the jig costs nothing.
For repeatability, make a spacing comb from another strip of card. Cut notches at the rib pitch taken from the plan, then use it to check the gaps between fences before you commit to glue. A steel rule works too, but the comb is faster and less likely to slip.
Set incidence and washout before the glue
A small sport wing usually wants zero or very slight positive incidence at the root, and a touch of washout at the tip. The exact figures come from your plan, not from this article. What matters is that you build what the plan says, not what the jig drift gives you.
Make a card gauge for incidence. Cut a triangle that matches the rib’s chord line, or use a cheap incidence gauge if you have one. Check the root rib, a mid-span rib and the tip rib. If the trailing edge at the tip needs to sit 2–3 mm higher than the root to create washout, pack it with card shims before the glue goes on. Write the shim thickness on the board in pencil so you do not forget which side is which.
Then check for twist. Sight down the leading edge from the root. It should look like one clean line, not a gentle snake. Do the same along the trailing edge. A surprisingly useful trick is to stand a mirror at the tip and look along the wing; errors that hide in a direct view often show up in reflection. If one rib is leaning, re-pin the card fences rather than forcing the rib with glue.
The dry run that saves covering day
Before any glue, dry-assemble the spar, ribs and trailing edge. Pin everything down, then check three things. First, the rib stations: every rib should sit on its line. Second, the spar slots: the spar should drop in without needing a fight. Third, the diagonals: measure from the root leading edge to the tip trailing edge, and from the root trailing edge to the tip leading edge. If those measurements differ by more than a couple of millimetres, the wing is slewed on the board. Fix it now.
Only then reach for the glue. Use it sparingly around the joints, not in a heroic smear that welds the rib to the card. If a joint needs holding, pin through the card into the rib — not through the rib into the board. The card is sacrificial; the rib is not.
Mistakes that only show up at covering time
The classic error is a rib that is upright at the root and leaning at the tip. It looks fine in the jig because the card fences are hiding the lean. Check with a square at every station, not just the first and last. Another is losing washout when the wing comes off the board: the shims fall away, the trailing edge relaxes, and you cover a wing with less twist than you intended. Mark the tip rib and photograph the setup before you lift the wing.
A third mistake is building on a board that is not flat. It is easy to blame the plan or the balsa when the real culprit is a shelf that has been storing paint tins for three years. Finally, do not leave the wing pinned to the jig for a week and expect the card to stay true in a damp shed. Bring it indoors, let the glue cure properly, and accept that cereal-box card has a short but useful life.
None of this replaces a proper building table if you have the space. But for the kitchen-table modeller, a flat offcut and a cereal packet will get a small sport wing straight, repeatable and ready for covering. The jig costs pennies. The habit of checking before the glue sets is worth rather more.