Foam, Glue and Grit: A £40 Club Trainer You Can Repair in an Evening

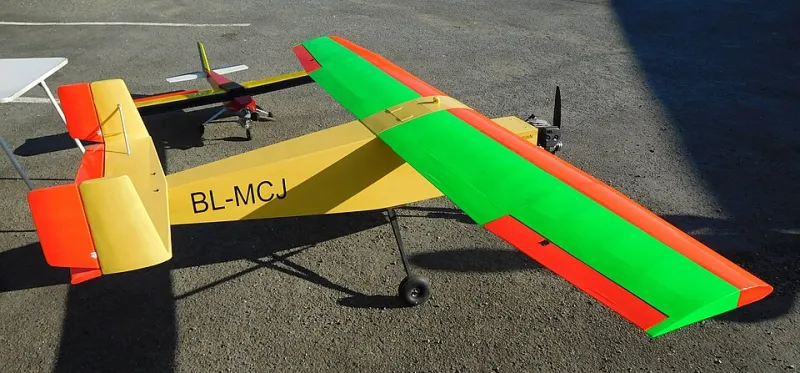
Photo: Depron foam board RC trainer plane build workshop, via thumbs.dreamstime.com
The £40 club trainer is not a myth, but it does rely on a certain amount of scrounging. The idea is simple: a slab of 6mm Depron, a cheap outrunner, two servos and a battery you already own. It won't win a scale competition. It will survive a nose-first arrival on damp UK grass, and you'll be able to repair it before the kettle boils.
This is a build feature, not a kit review. The plan is deliberately simple: a high-wing, three-channel trainer with a 950mm span, a box fuselage and a belly-landing profile. Build it, trim it, fly it — then build another one when you've worn the first out.
What you need
Shopping list and rough UK costs
| Item | Typical price | Notes |
|---|---|---|
| 6mm Depron sheet, 700 x 500mm, x2 | £8 | Model shop or online foam specialist |
| 2205 or 2306 outrunner, 1400–1800kV | £9 | Budget brand is fine |
| 20A ESC | £6 | With BEC |
| 2 x 9g servos | £6 | Metal gear not needed |
| 8 x 4 prop | £2 | Buy a pack |
| 3S 800–1000mAh LiPo | £10 | Often already in the stash |
| Hot glue sticks | £3 | Lots of them |
| 3 x 1mm carbon strip | £3 | Wing spar |
| Pushrods, clevises, horns | £4 | Or use piano wire and heat-shrink |
| Tape, Velcro, ply motor mount | £4 | Crossweave tape is your friend |
| Total | £55 | £40–£45 if you already own the LiPo and receiver |
Depron is available from model shops and online foam suppliers. Avoid the paper-faced foam board from craft shops for the flying surfaces — it works for templates, but it's heavier and hates damp. A hot glue gun, a sharp knife, a sanding block, a steel rule and a soldering iron are the only tools you really need.
Cut the parts
Work on a clean bench and cut everything before you start gluing. The fuselage is a simple box: two sides at 700 x 70mm, a top and bottom at 700 x 60mm, and a nose doubler at 80 x 70mm. The wing is 950mm span with a 180mm chord, built as two panels joined with 20mm dihedral at each tip. The tailplane is 260 x 80mm and the fin is 120 x 80mm. Cut a battery hatch in the top deck and keep the offcut for a hatch cover.
Glue it together
- Build the fuselage box with hot glue, checking for square as you go. Add the nose doubler and a ply motor mount.
- Join the wing panels with dihedral. Sand the root faces so they meet cleanly, then glue and reinforce the joint with crossweave tape.
- Cut a slot for the carbon spar and glue it in with the strip vertical for stiffness. Add a second strip on the underside if you plan to fly in wind.
- Glue the tailplane and fin in place. Sight down the fuselage and check the tail is square — a twisted tail makes a trainer feel awful.
- Fit the wing with a foam saddle and two rubber bands or a pair of nylon bolts. Rubber bands are lighter and they give in a crash.
Fit the electrics
Mount the motor, ESC and receiver, then fit the two servos in the fuselage ahead of the tail. Run pushrods to the rudder and elevator, supporting them with small foam guides so they don't bow under load. Keep the ESC where it gets cooling air, and Velcro the battery on the centre of gravity so you can move it fore and aft.
Balance and throws
Set the CG at 25–30 per cent of the wing chord — roughly 45–54mm back from the leading edge. Balance upside down with the battery fitted. For first flights, set low rates at 70 per cent, rudder at 20mm each way, elevator at 10mm each way, and 30 per cent expo. That is enough control for a sports hall and not enough to snap into a stall on a gusty club field.
Maiden day on a gusty UK field
Pick a day with a steady 5–8mph wind rather than a dead calm one — you want to know how the model behaves before you meet a proper gust. Long grass is your friend. Do a glide test first: power off, launch gently into wind, and check it floats straight and stalls without dropping a wing. Then fly under power at three-quarter throttle.
Launch into wind, keep the climb shallow and turn gently. If the model pitches up, move the battery forward 5mm and try again. If it feels sluggish in roll, add a touch more dihedral or aileron — but for a first trainer, rudder is enough. Land into wind, cut the throttle early and let it settle into the grass. Belly landings are the whole point.
Grass survival and field repairs
Tape the leading edges and the nose. Fit a prop saver or a folding prop. Keep a 12V hot glue gun and a roll of crossweave tape in the car — most prangs are a ten-minute fix. Bag the receiver if the grass is wet, and check the motor mount after every heavy arrival. The foam will bruise, the glue will go stringy, and the model will keep flying. That's the brief.
Final word
This is not a pretty aeroplane. It is a flying workshop project that teaches you more about trimming, balance and repair than any ARTF ever will. Build it cheap, fly it often, and don't cry when the nose comes off. Hot glue is cheaper than a new kit.